Man I have been one heck of a busy chick lately. (In a not so chickish way- meaning I have been in pajamas with my hair thrown up in a scrunchy for the past 2 weeks) ... Because I have been working my buns off to get my illustration job done ON TIME.... and I mean it will be done on time.... So while we are all waiting here to get some major projects going I am sitting at my computer painting.
Not that there is anything wrong with that...... I've just been doing it for the last 9 months... (wow- I could've had a baby in that amount of time) That's actually a pretty long time.
This job is sort of like a baby, it's grown bigger and bigger and bigger.... Almost time to give birth! WOot WoOt!
I'm excited to get going on some stuff for my FIRST HOUSE!!


It's White, It's Black...
So guess what we did?
We are moving to a new house soon (which doesn't include a fridge)
So I've been searching for one. I found one that we bought for $140, works great
(they just got new stainless steel appliances)
But the only problem was that it was white. All the appliances in our new place are
black.
But I had watched a segment on Studio5 where they painted a fridge
We are moving to a new house soon (which doesn't include a fridge)
So I've been searching for one. I found one that we bought for $140, works great
(they just got new stainless steel appliances)
But the only problem was that it was white. All the appliances in our new place are
black.
But I had watched a segment on Studio5 where they painted a fridge
We used this:
 And this
It is $4.56 a can at Home Depot or Lowe's.
You can get it in either black, almond or white.
If you want to do it yourself here is the link:
http://sassystyleredesign.blogspot.com/2010/07/how-to-spray-paint-your-fridge.html
If you want to do it yourself here is the link:
http://sassystyleredesign.blogspot.com/2010/07/how-to-spray-paint-your-fridge.html
Our before:

During:

After: (I will take a new pic once it's in the new place)

...........................................................................................
And other items of business...
Look what I got yesterday! And for only $30!! Table with 5 chairs! I've been keeping a lookout for this style and boy was I tickled silly when I saw these babies!
I am thinking I'm not in love with the style of the legs...

So I have another table (that would've been perfect however the top is veneer and not wood, so I can't stain it... I was thinking of transplanting the legs from that table to this...
But what do you think? Does the style of the legs go with the chairs?? (I took a picture and pasted it onto the new one)

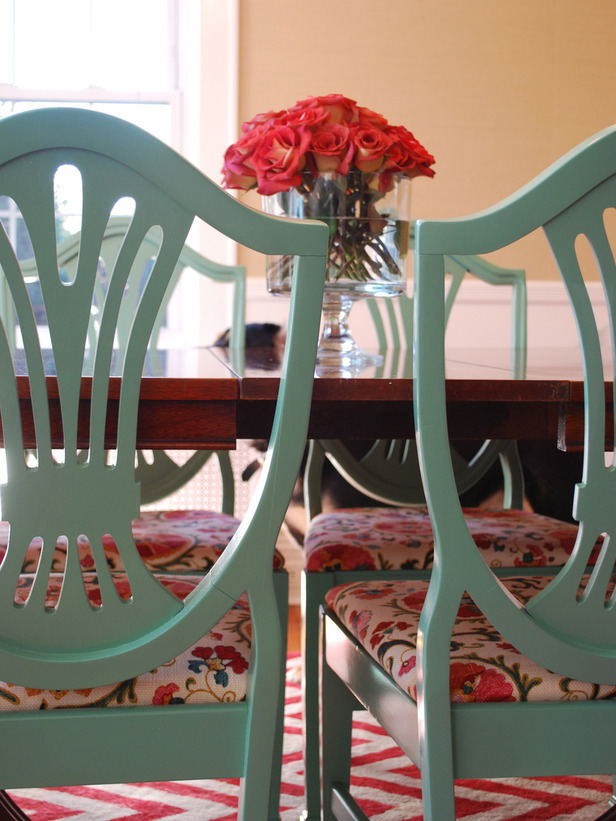
And look at these gorgeous shield chairs!

what got me even more excited was when I saw this picture on hgtv's webpage............
See the shield shape?? Wow. I feel like a lucky gal right now...
Shower onesies
I just finished making some onesies for my sister in laws shower. She is having a BOY and a GIRL! I'm totally excited! One of the pairs match- the boy's tie and the girls ruffle bum.
Maybe I'll do a tutorial on how to make the ruffel bum sometime. I got the fabric from "Gracie Lou's Quilt shop" They have some adorable fabrics there. You can click on the picture to see a larger version of each.


Maybe I'll do a tutorial on how to make the ruffel bum sometime. I got the fabric from "Gracie Lou's Quilt shop" They have some adorable fabrics there. You can click on the picture to see a larger version of each.


Rolled paper wreath
Found this tutorial on how to make a rolled paper wreath. I thought it looked pretty cool. My new front door will be dark, so I think I could make a pretty cool "white" paper wreath.
*stashing this on my 'to do' list. Want to make one? Go here.


*stashing this on my 'to do' list. Want to make one? Go here.
http://www.homemademamas.net


Create mercury glass from Looking glass spray paint
I was so excited when I read this post from Frugal Farmhouse Designs, and saw what she had done with a simple piece of glass! Now I'm excited to try this out for myself! She used "Looking Glass" Spray paint from Krylon, way cool dude! Click here to see.


DIY chandelier
Blog surfing again *what's new* I came across this project someone did- I have been wanting to create something like this to put in our new front room... Glad I came across it. To see how to make one click here


Home Dreaming....
*sigh... can I move into my house already? My creative bug is just spilling out all over the place. Seriously you do not want to know how many pictures I have saved in my folder of decor pictures! I've been so excited and anxious that I'm filling it to the max with all the lovely ideas out there. Ok so these are just "a few" of the many pictures that inspire me. Sorry I didn't take the time to write down where they are from (I think if I did, I really wouldn't have a life and my family would be very much neglected. )


t


t


My quick throw together collage
So the place I'm renting has this big wall space **heart!**
and I had had all these items and just kind of threw them together.
and I had had all these items and just kind of threw them together.

I spray painted the frames. They were all varieties of colors and styles.
I've decided my favorite decorating item is Keys.
Don't you love that giant one? I got it at a yard sale!
It looks like something you could find at Rodworks. I haven't seen any like
that one however, I'm not sure where it's from.
I've decided my favorite decorating item is Keys.
Don't you love that giant one? I got it at a yard sale!
It looks like something you could find at Rodworks. I haven't seen any like
that one however, I'm not sure where it's from.

And I am SOOOO excited! We bought a house! YES! My very own decorating space of fun!
So I'll be taking this collage down and adding it to the new place! I'm so excited, I have so many
projects lined up! I'm licking my lips just thinking about it......
Finished book!
I finally got around to finishing the book! Now I can just make more pages here and there in the future to add in. (for links to where some of my pages were inspired by look at the previous post!)

This one was a combination of someones idea and a little spin of my own.
I found this cute fabric at Gracie Lou's quilt shop in Salem. They have adorable
fabrics there!


So I really wanted a barn page. I had gone to the local DI and saw a "soft" book
with a manger story, and I snipped out the cow and chicken and put them
with a manger story, and I snipped out the cow and chicken and put them
into my barn (since they were fabric, I washed them ahead of time in the wash)

This one was a combination of someones idea and a little spin of my own.
I found this cute fabric at Gracie Lou's quilt shop in Salem. They have adorable
fabrics there!

This "Pingo" themed paged came from my own little creativeness.
My son loves the book "Pingo"
My son loves the book "Pingo"

This rocket ship theme was not my idea, but I loved it so much
I HAD to make one! SO fun! My son loves to fly the rocket ship!
I HAD to make one! SO fun! My son loves to fly the rocket ship!

Decorating with Cabinet doors...
I bought some cabinet doors today for 50 cents each!! So excited, I'm going to do some of these projects once we move to our NEW HOUSE!!! :)
Studio 5
Designer Katie Evertsen demonstrates different ways to dress up a throw-away cabinet door.
• The first and easiest way to turn a cabinet door into something unique is by using double sided tape or hot glue to adhere ribbon to the top of the cabinet in a lattice pattern. Once the ribbon is adhered you can embellish with hardware or leave plain. Photo boards are a great way to display photos, notes, recipes, or homework.
• The second way you can utilize a cabinet door is by taking a cabinet door and adding vinyl lettering to the cabinet. The possibilities here are endless. You can add lettering for a holiday, i.e. Give Thanks, Merry Christmas, or Happy Halloween. Or you can be room specific by creating a vinyl letter board for the Laundry Room, Kitchen, or Mud Room.
• Another way to utilize cabinet doors is by sanding the center of the cabinet door, and applying a chalk board paint to the middle of the cabinet. This sort of paint can be purchased at Lowes or Home Depot. This is an easy way to make a great chalk board.
• A very simple way of using a cabinet door is to add hooks to the center of a long skinny cabinet for a great coat rack, or a place to hang accessories.
• One of my favorite ways to embellish a cabinet door is by cutting out the center of the cabinet door. The cabinet is usually dived into two pieces, the frame and the center. You do not need to cut perfectly around the center of the frame, just make cuts on the back of the cabinet towards the outside of the center of the frame and pop the center out. You can then using caulking to attach a piece of glass to the center of the cabinet. From here you can:
-Add vinyl letters to the glass.
-Press flowers or leaves between the glass.
-Make a frame.
-Make a mirror.
Making my first Quiet book.
This Quiet book craziness all started when I was looking at my friend Tricia's blog. She made a quiet book for her son and something in me said "I want to make one too!!!"
It's actually been so fun to do because it really does involve art, which is my arena.
I saw this page and the name page below from : Homemade By Jill
It's actually been so fun to do because it really does involve art, which is my arena.
I saw this page and the name page below from : Homemade By Jill

Ok, so I decided to go all out and crazy. My little guy LOVES the book Pingo. So I started snipping out material to look like Pingo. (The end result to come!!)

I'm going to be making some felt flies for this frog to enjoy..


Model Home
These ares some pictures of a model home, sorry they are so blurry, I wish they were clearer as well. I absolutely LOVE the style of this home!


Subscribe to:
Posts (Atom)
